Showing posts with label wheels. Show all posts

Sunday, 9 December 2018

December 2018 meeting

On a cold day in Edinburgh, we nonetheless mustered a table-full of 2mm modellers: Alisdair, Alistair, Andy, Jim, Stephen, Chris, Phil, and Roy from the Grampian group met at Graham's house.

After the customary tea, coffee, chat, soup, bacon rolls, and mince pies (thanks Roy), we proceeded to this month's demonstration. This was by Alisdair, who showed us how to (irreversibly!) modify commercial N gauge metal-tyred wagon wheels for use on 2mm finescale track. His chosen weapon was his 1970s-vintage Unimat lathe, still going strong and useful for all kinds of small modelling jobs.


The 2mm finescale standards are given in the Association Yearbook and online. For convenience the relevant tables are reproduced here.


The main dimension of interest is FW, the flange width. These tend to be around 0.5mm in modern N wheelsets, and although this is an improvement on the 0.7mm common on older wagons, it is still too wide to reliably go through the 2mm pointwork wing-rail flangeway (WF) and check-rail flangeway (CF) at 0.48mm and 0.53mm respectively. The 2mm standard for FW is 0.3mm. Cosmetically, it is also worthwhile reducing the tread width (TR) to 1.0mm, so that the wheel profile looks more prototypical.

Alisdair explained he'd first tried modifying wheelsets when he first moved to 2mm scale from 4mm. He found an article in "Model Railways" which recommended using collets to hold wheels. It seemed to make sense, so he turned his own collets in the Unimat from brass and sawed slits so they could be compressed gently in a three-jaw chuck to hold the wheelset by the tyre of one wheel, without removing the wheels from the axle.


The first one didn't work, because he had not tapered the inner diameter to suit the wheel tyre coning. The second one, with taper, worked once then also lost grip. Frustrated, Alisdair put the collets to one side and resigned himself to buying new wheelsets from the 2mmSA shop or sending N wheelsets off to the Association's wheel turning service. Which as we all know is very efficient and remarkably good value. But there was still a nagging wish for the satisfaction of doing the job himself.

A chance conversation with 2mmSA magazine editor (and former FCAG regular) Anthony Yeates suggested a new direction: simply hold the wheelset lightly in the three-jaw chuck , and support the other end at the axle pinpoint in a length of brass tube in the tailstock chuck. The tube acts as a "hollow dead centre", holding the axle concentric and providing enough support for a tool to be used to turn down the wheel flange and face. Here's the tube in position in the tailstock chuck.


To cut the metal, a boring tool was used, since it was small enough to fit between the two wheelsets on the axle. The aim is to do the work without removing the wheels from the axle, which risks destroying their concentricity. After setting and trueing the wheelset in the chuck with the axle in the tailstock support, the first operation is to thin the flange of the wheel in the 3-jaw chuck, then without disturbing the workpiece, thin the tyre of the other wheel. The chuck is then slackened off, the workpiece reversed and trued again, and the second flange and tyre are dealt with.

Here's the operation in detail. First the wheelset is gripped in the three-jaw chuck, which is tightened to hold the wheel lightly.


The support tube is placed in the tailstock chuck which is tightened firmly and rotated to check for concentricity. The tailstock is then advanced to the axle end:

and its spindle advanced so the tube is positioned on the axle pinpoint so there is no slack, but without undue pressure.
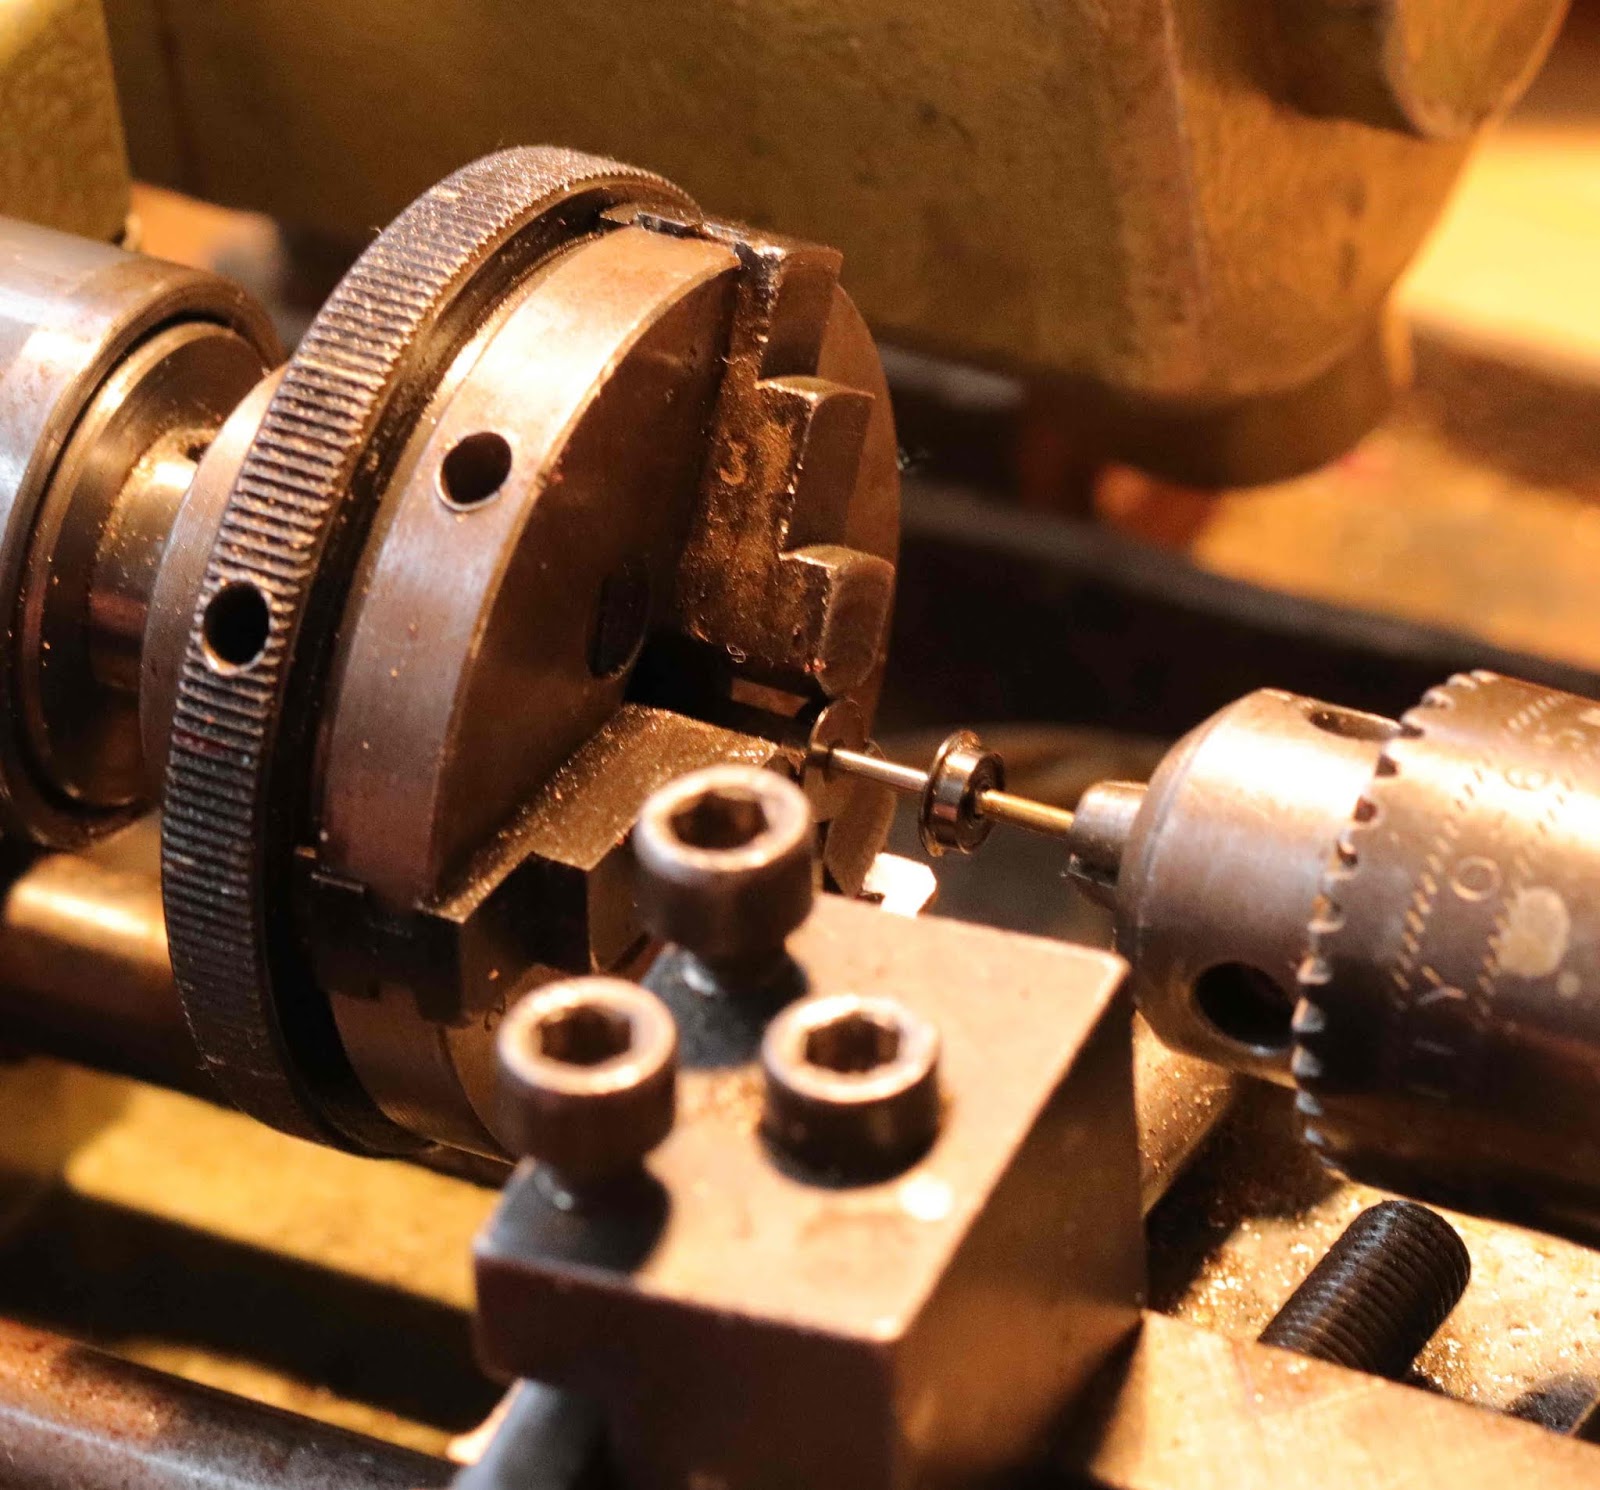
The chuck is spun once or twice by hand to check the whole thing is concentric, then tightened firmly using its tommy bars. It's important not to overtighten the chuck, or the wheel tyre will be dimpled and ruined. Don't forget to remove the tommy bars from the chuck!

Here's the setup viewed from behind - headstock and 3-jaw chuck now on the right, tailstock on the left. We're going to remove metal from the green-line side of the flange first until dimension FW is 0.3mm, then from the green-line side of the tread until dimension TW is 1.3mm.

The flange width is measured with a vernier gauge to determine its current width, 0.3mm is subtracted, and that's the amount of metal which needs to be removed. At this point a graduated handwheel on the tailstock is very useful, to give a fairly reliable indication of how far to go.
With the lathe still switched off, the tool is advanced until the edge is just touching the back of the wheel, backed off slightly,
then eye protection is worn and power is switched on (Alisdair use a fairly high cutting speed for brass, about twice that recommended for steel, with spit as lubrication)
and the flange is thinned with a multitude of light cuts, each time feeding the tool from the flange edge towards the axle, backing out, then advancing the tailstock slightly with its handwheel and taking the next cut.

Once the dimension judged by the handwheel gradation is close, the lathe is stopped and the flange dimension checked with the vernier gauge.
then the flange is brought to size with a final light cut or two.

Next the tread width of the other wheel on the axle is reduced, with the same technique. Care is required since the wheel may move on the axle if too heavy a cut is taken

The lathe is stopped, and the wheelset reversed in the three-jaw chuck, and with the lathe under power, the squared-off edge of the first reduced flange is given a light touch from an nail file emery board (from a chemist or pound shop, or swiped from a dressing table) to round it off, to avoid it catching on point blades, risking derailment. (The photo shows the principle, but in practice the tailstock support would be engaged).
Then the same set of operations is carried out again, to reduce the second flange and second tread and round off the second flange back. 

The comparison shows the difference in appearance between unmodified and reduced wheelsets.
The wheels are now set to gauge and are ready for use in a wagon or coach. Disc locomotive wheels can be dealt with in the same manner, but spoked wheels generally can only have the flange reduced since the spokes will distort or shatter due to lack of support if an attempt is made to reduce the tread width.

Alisdair also showed us his latest wheel manufacture efforts, having rejected those he showed us last month.


The tyre is turned from steel. The brass insert is made by turning a disc and half axle as one piece, ensuring that the disc is a snug fit in the tyre. Spoke position are marked out using the lathe (switched off) as a dividing engine: the insert is held by its half axle in a chuck in the headstock, a tool is placed in the toolholder which is advanced to scratch a reference mark on the edge of the disk, the tool is backed off, then the headstock rotated by hand the correct number of degrees, and the position of the next spoke scratched on by advancing the tool. If there are no angular positions marked on the headstock, it is easy enough to add a paper disk or marker pen dots. Once the spoke positions are marked out, the spokes are cut and filed to shape. We did not find out whether the inserts are glued or soldered in place. Maybe Alisdair has not got that far yet!

After this we had intended to do some further work on Sauchenford's fiddle yards. Alisdair was meant to have brought these with him from Glasgow, but unfortunately when he unpacked his car he found he'd left them behind. So there was nothing for it but to unpack individual projects and get on with that.

Thanks Alisdair for an informative talk which demystified another 2mm "dark art".

Saturday, 6 May 2017

May 2017 meeting

Back in Edinburgh for this month's meeting. Alisdair, Alistair, Andy and Graham were joined by special guest star Nigel Cliffe, who among other Association jobs is the wheel elf gaffer. Nigel had brought along a box of chocolate brownies and some wagon wheels for inspection.


The chocolate brownies were exceptional. The wagon wheels (2mm ones, not the 1970s chocolate biscuits) were also precision works of art, as were the press tools for inserting the wheel centres ... 


 ... into the correct size of tyre, then, using a second tool, pressing in an axle at the correct back-to-back.


Nigel went over the process - principles and practice - in some detail, and we all had a shot at making wheel sets. We ate the brownies, which had a calming effect; we sipped tea; we relaxed. Then came the sucker punch ... this was not simply part of the Association's educational outreach program. Gaffer Cliffe was looking for new elves! In vain we attempted flight; the brownies had done their work, and we could barely move. Escape was impossible: we were cornered. Press-ganged, you might say. The story will continue in a future blog entry.

We had lunch, then started on the main task of the day: fixing Sauchenford's illumination. The existing halogen bulbs gave uneven lighting - bright spots separated by pools of darkness. A reel of LED lighting was deployed:


along with a reel of masking tape, and after an hour of gradual alterations we had eliminated the halogen bulbs altogether in favour of three LED strips on a lighting bar, arranged to project further in front of the layout so that the trains are not in shadow while the backscene is in sunshine. (These are Nigel's wagons on the layout, by the way). 

We were bothered by a reflection pattern from the rails, due it seemed to the regular spacing of the LEDs, until experiments with tracing paper at a 3cm distance from the strip, acting as a diffuser, solved the problem. Running the LEDs at about two-thirds brightness (using a digital control bought on the Internet) seemed to give the best effect.


After that it was back to the tea and coffee and general chat. Alisdair produced his Caley Jumbo for a progress update - he's been working on detailing the tender most recently, with brake gear and lamp irons evident. But it has nae lum! Not yet anyway. 


Alisdair was not saying whether it will have a proper Drummond built-up chimney, or a BR-era stovepipe. Time will tell. This loco-building clearly requires a special diet, however, as Alisdair demonstrated at the lunch stop on a recent Caledonian Railway Association tour of South Lanarkshire:


Reliable witnesses state that he also consumed a large slab of cake after polishing off that "snack". Apparently he's in training for the North East Area Group's "big tea" at their 35th birthday party in two weeks' time. Where will it end?