Now that the group layout "Sauchenford" has been disposed of, there was time for an extended havering session (also known as "show and tell"). James initiated a long discussion about DG couplings. Not personally being an adherent of these I was bit lost in the detail, but it centered on the lack of fixing or adjustment options built into the etch.
I was fishing for advice regarding for a chassis for a steam railcar project ... Nigel suggested the Tomytec range and referenced this handy dimension summary. He just happened to have one with him - a TM-21 - which looked like a good fit for my needs.
Alastair, meanwhile, was showing off his finescaled Farish Class 37.
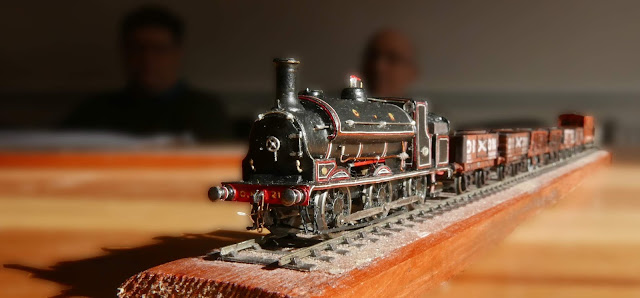
Jim had his Jubilee Tank with him, painted, and looking rather nice in the sunshine.
Chris had brought along the results of recent experiments with an inexpensive (well, relatively inexpensive: £350) laser cutter based on a CNC router driven by an Arduino board using GRBL firmware and Lightburn software (£40) to manage the cutter settings for different materials. Design is done in CAD software. He has used this cutter to considerable effect to produce 2mm scale card buildings for his planned BR-era Southern layout. A core of 1mm-thick card is used for floors and walls. Windows and doors are cut out and a system of slots and tabs ensures fast, square assembly.
This is considerably more accurate than he found possible using a Silhouette cutter. Roof tiles are also produced in the laser cutter, from standard sticky label stock, by cutting through the sticky label but not the backing paper (achieved after some more tweaking of settings), to make strips of tiles slit to half-height for the the vertical edges. These can then simply be peeled off the sheet and applied in overlapping fashion.
The results were really extremely impressive. Best of all, as Chris said, if a mistake is made or if further similar buildings are required, it's a simple matter to cut more card or paper. Here are more buildings he's produced using these techniques.
Jim also had plans to show round. These were for his next contribution to the Grampian Area Group's Dunallander layout, namely platform awnings. The etches for these are now ready (although not available for the meeting) and have been the object of considerable prototype research and planning.
Nigel also had a half-built etch with him, for a French B-B electric prototype, but we were only allowed a quick glance at it before he spirited it away. Next time ...
James had brought a DCC Concepts rolling road, which was put to good use to display the fine control of Nigel's NGS industrial shunter. Nigel had also bought along its custom-designed DCC chip for inspection. The design has since changed to reflect component availability, but the tiny size is striking. Yes, that's a one-penny piece.
After we'd partaken of lunchtime sandwiches and three kinds of cake (gingerbread, Battenburg, and lemon polenta, since you ask) a long discussion ensued on the subject of the the next group layout.
Oh sorry, wrong photo. Here we are:
We agreed it must be a project to learn skills, explicitly intended for disposal after three years, and will primarily be a working diorama to front the 2mmSA Further North roadshow stand at exhibitions. Good presentation will be important. It will be small - three feet long, since no-one is willing to store anything larger - and will aim to show handbuilt 2FS point and crossing work, but will also demonstrate the use of Easitrack and 2mmSA pegged-chair turnout kits. An industrial theme is in the air.
We were sent away with instructions to come up with concrete ideas for the next meeting, likely to be in the Livingston area on 4 April.


Hi Gents
ReplyDeleteCan't get the pictures to load!
Thanks for letting me know ... I hope it is fixed now.
ReplyDelete