Our virtual meeting this month saw Nigel, Alisdair, Jim, Chris G, Tony, Mick S, Graham, Simon and Stephen zoom in for a session with the theme "Buildings".
First up was Chris, who took us through the technique he has developed for Bosaleck, written up in more detail on
RMWeb, and indeed reported on from our
March meeting. But you can never have too many photos so here's a sequence of what he showed us:
Starting with a "kit of parts" on 1mm card. The laser can cut holes with separation down to 0.3mm.
Spray with ultramarine/umber mix below and white acrylic above, and dust with Attwood Aggregates Scenic Dust:
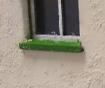
Doors added, masked and sprayed green
Glue in the glazing:
The window sashes sit in the reveals:
Magnetic clamps from
Smart Models: a great time-saver:
The laseer cuter makes it feasible to design buildings with full rafter and truss detail which locate accurately into slots in the walls, without spending months or going mad with boredom cutting it out with a craft knife:
Roof tiles printed on brown 80gsm Kraft selfadhesive paper
Two coats of Bog Oak acrylic paint:
(Very) dry-brushed with a minimal amount of white. The slight raised texture of the brown Kraft paper helps here.
Gutters also cut by laser in 0.5mm grey board: the tangs attach to the underside of the roof board. No attempt made to round off the gutter, but after painiting the correct colour, a black marker pen is drawn along the top to give an impression of depth:
Sills are similarly cut from 0.5mm material
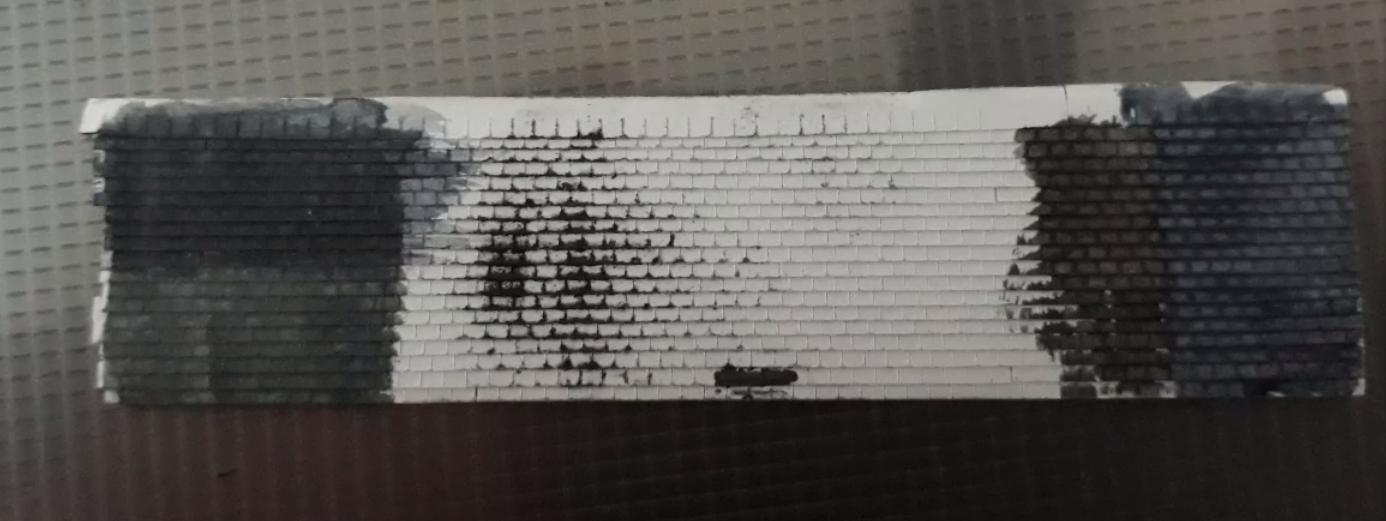
Bridges are made from laser-cut card with computer-printed downloadable brick paper:
Next on stage was Jim, who summarised his building technique used on Kirkallanmuir. CAD elevations are designed then a cutting file is sent off for laser cutting from 1mm MDF.
The cutting is precise enough that the delivered parts fit perfectly in a "dry run":
Smart Models downloadable building papers are purchased then manipulated to change the colour balance in Microsoft Office Picture Manager. Signwriting details are edited in as required:
Windows from Jim's own etches: they are painted before glazing material is slipped into the slots between the layers:
Gutters and downpipes are added from styrene and wire. A dental burr is used to scrawk a half-round groove into the guttering.
Alisdair showed us his recent experiments in producing roof tiles with the help of a Silhouette cutter. He used 80gsm white self adhesive labels. Plain water colour (on the right) was not very effective. Much better was enamel (on the left, one patch thick, one thin) with thin watercolour on top.
Alisdair's building material of choice is styrene sheet. A recent model of a Highland Railway store was made from Evergreen siding.
His technique for guttering is to use an all-round horizontal frame of styrene, with the gutter simply scribed into the surface. The frame is then cut down to the edge of the gutter and the inner part is cut out before being fixed to the top of the walls.
Alisdair took us through his multi-layer technique to build up windows. The various views in the sketch should help: the numbers identify the same part in each view.
An example of the finished result:
An earlier technique he used to represent window sashes was simply to glue microstrip behind the window apertures:
Mick's building technique starts with hand-cut card parts and brickpaper covering (Builderplus or Howard Scenics), as instanced by these shots of a pigsty for his Callaton layout. The paper is left with overlaps: when joining two pieces at a corner, one is trimmed off first, the part is joined, the overlap form the second one brought round the corner and carefully trimmed, with the white edge removed using a touch of watercolour. A razor blade and a scalpel are indispensable.
A corrugated-iron roof is added from wine-bottle metal foil imprinted with corrugations using two coffee-jar lids:
The sleeper fence is made by cutting individual sleepers from card and gluing them to horizontals of 1/32" or 1/64" plywood.
Finally the bottom of the fence is trimmed flush using a razor blade and a hammer while holding the camera in your teeth. What could possibly go wrong?
Once the blood is cleaned off the fence, it can be planted in the ground and looks very effective. The standpipe added near the corner has flooded the ground - the water is represented using the Gordon Gravett technique of microscope slide cover glass.
That ended the "Buildings" theme, but it was interesting to see how four modellers use very different techniques to achieve such high quality results.
Simon showed us the baseboard legs he has made for Glenfinnan, using IKEA bed slats as raw material. These are nicely seasoned and can quite often be acquired for nothing from discarded furniture. A base plank of 3"x1" is rebated to take the IKEA bed slats. Two slats are used for each leg, with a slot routed in one to take a sliding peg and tightening bolt on the other, so height adjustment is possible. A triangular flap, hinged so it can fold flat for storage, provides stability
We spent some time discussing (yet again!) the possibilities for a new group layout once lockdown has eased. A shed scene may offer possibilities. Our homework is to come up with some concrete ideas.
The next meeting, still likely to be virtual since Scotland will still be in phase 2 of the lockdown relaxation, will be on 11 July.


No comments:
Post a Comment